
Kitchen Inventory is a daunting task that managers face each month, but it doesn’t have to be a headache. With so many storage areas in your restaurant, it can be a tedious task. Having the right tools and systems in place will make the process easier. There are many ways to approach taking inventory, such as BevSpot’s kitchen inventory app. This guide is designed to show you why you take inventory, how to set yourself up for success, and what to do with the results by calculating usage and cost of goods sold (COGS). While you’re here, take a look at our other blog posts, or speak with one of our awesome customer success representatives to see how we can help your restaurant run more smoothly.

Particularly in small operations, it’s tempting to approach kitchen inventory control casually. There may be only one or two people handling ordering who are generally aware of what product is on hand. That doesn’t negate the need to track purchasing and ensure your costs are properly managed. Having systems in place to track inventory enables you to better manage these costs, and these metrics are what general managers and owners look at when evaluating performance.
Through taking inventory, the goal is to get the exact value of every food item in your kitchen to measure your restaurant’s performance. Having a good system for this in place can also identify:
Looking for a bar inventory guide? We’ve got you covered.
The goal of inventory is to calculate your product usage for a certain period. Most managers like to see inventory taken at least once a month, but that cadence can vary to weekly or biweekly. Many factors play a part in this process, but here is the basic method.
You’ll need to know:
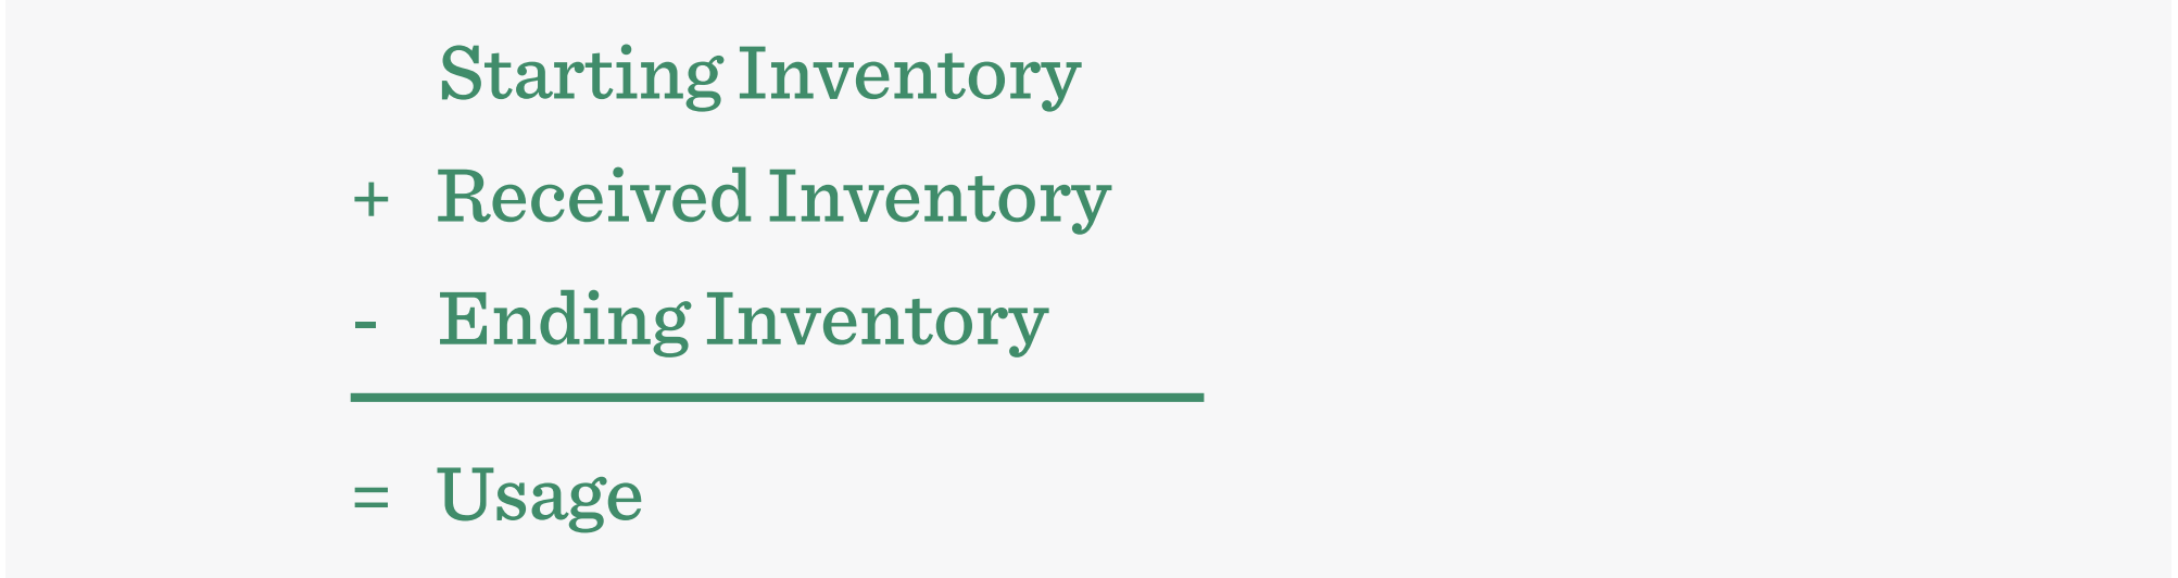
Use these numbers with the following formula to determine your inventory usage:
Usage is directly related to Cost of Goods Sold; usage refers to the “by volume” amount of product used, and COGS the monetary value of that usage. On the product level, multiplying usage by their product cost will give you your monthly COGS. With that information, you’re able to calculate your food cost by dividing COGS by total food sales. Check out this video for more information on COGS and how it relates to your business.
Being able to turn this data into actionable information to improve profitability within their restaurant turns a good manager into a great one. Additionally, usage also helps us generate par numbers, expose any over pouring or theft taking place and build smarter, leaner orders.
To solve the usage calculation above, you need three variables. The first, starting inventory, can be whatever the previous inventory total value was. If this is your first inventory, that could be zero.
The second variable in the calculation is orders received. This is straightforward, being the sum of all your invoices for the inventory period. Be certain to digitally record your invoices; BevSpot makes this simple by recording and storing invoices, as well as managing all your vendors and ordering from one easy-to-use platform.
Finally, is calculating ending inventory. Next inventory, this number will be used as your starting inventory. Here are a few general pointers for making your life easier before taking an inventory:
Below, we’ve outlined the process of using a kitchen inventory list with a pen and paper. There’s nothing wrong with that, but it’s worth taking time to consider how inventory management software can help your restaurant run more efficiently. We’ve effectively bundled up the whole process for you. BevSpot’s inventory software dramatically simplifies this process, and you can do it right from your phone, tablet or computer.
After creating a free account, our onboarding team will help you set up inventory items, walk you through pricing batched items, setting up storage areas, POS integration, and guide you through the kitchen inventory software. As you continue to count inventory, place orders, and make sales, BevSpot crunches that data to generate advanced sales reports, expected inventory counts, par suggestions, and variance reports to identify shrinkage and waste.
The first step in the inventory process is to set up your kitchen inventory sheet. This should be like your order guide, with the addition of batched or processed products. To help you stay organized while counting, arrange the items within each storage area instead of alphabetical or a random order. List items in the order in which you’d find them in your walk-in and dry storage (we call this sheet-to-shelf). This way allows you to move in a more efficient manner and not need to back-track.
Your sheet now has rows for all food associated items; dairy, produce, meat, batched or prepared recipes, dry storage, and paper goods. It is advisable to add a row beneath each product category (produce, dairy, poultry) to get usage and food costs for each category. This will be helpful for identifying areas of opportunity. Next is to determine how best to count items. Take into consideration what measurements and containers a product arrives in, but ultimately it should be whatever is easiest for you to count. It is helpful to keep the counting unit next to the item for quick reference.
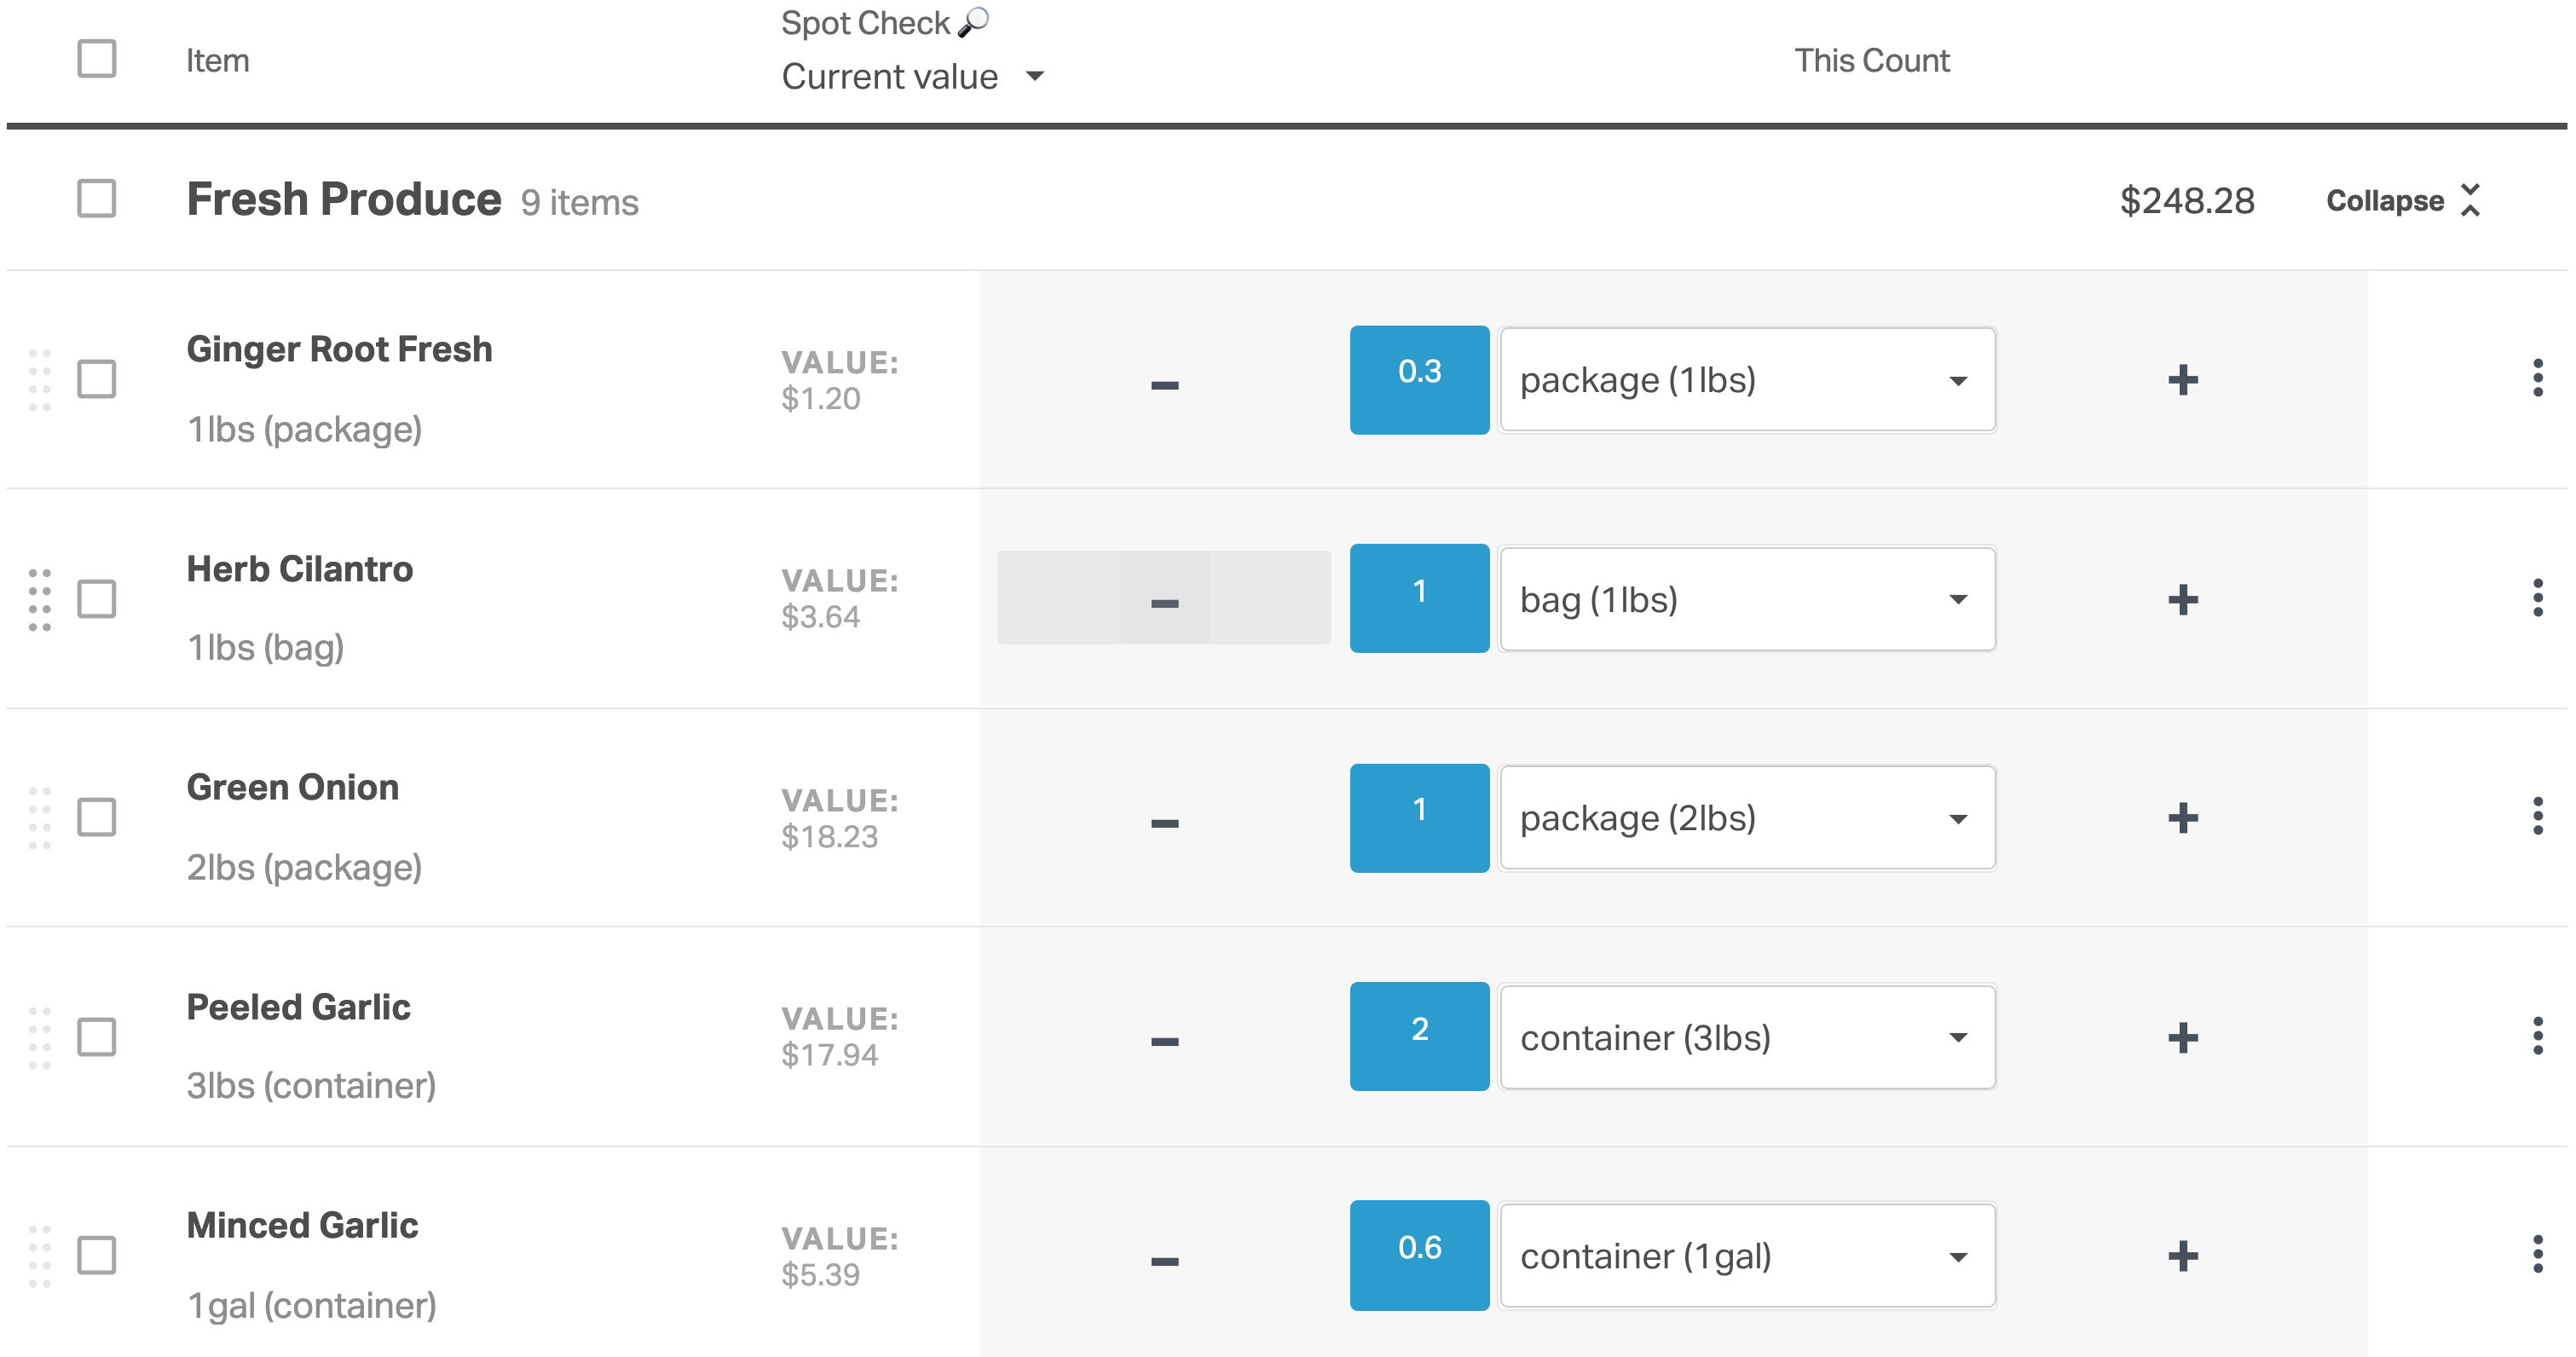
The easiest (and most commonly used) counting method is to visually take note of how much product is in each container, separating it into tenths. This is an estimate whether the package is half full (0.5), a third full (0.3), etc. This works for product that is based on weight or volume, but if you are counting product that has individual pieces you may prefer to count “units” or “pieces”.
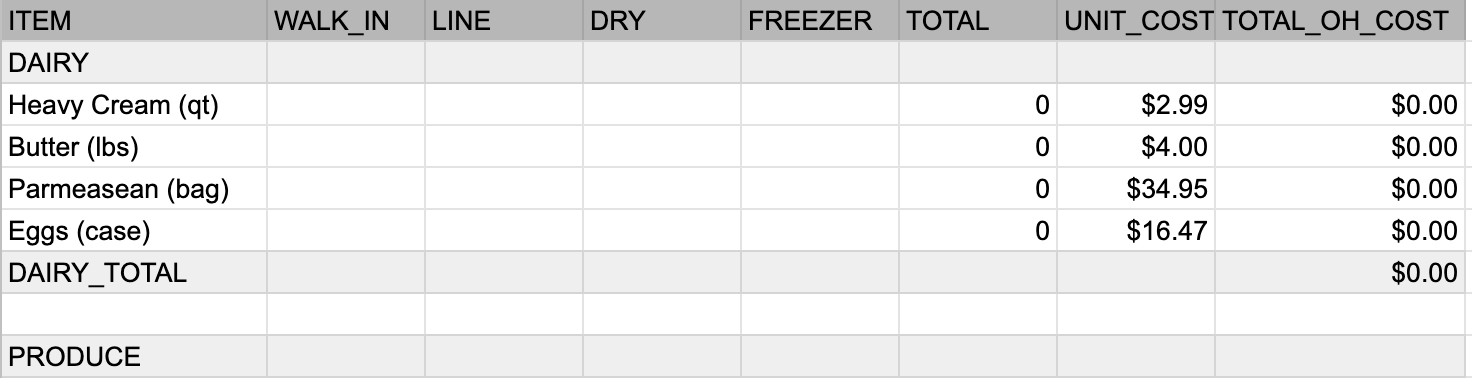
Your spreadsheet needs the following columns added:
Now that you know why taking inventory is important and have put a good system in place – it’s time to take inventory.
Beginning with the walk-in (it generally has the largest amount of inventory, and your inventory template should be set up in walking order based on it), take counts of what we have on hand. For each item in the walk-in, tally the total count of that item per the count unit. Count the total number of portioned steaks, gallons of milk, bags or pounds of cheese, gallons of bolognese, everything, and record it in the “walk-in” column.
Moving to the line, expect more portioned and batched items. It likely won’t follow the same order as the walk-in, but continue recording counts in the “line” column.
Continue this process for any freezers, dry storage, and paper goods areas. With paper goods, it is easier to estimate how much of the container remains rather than counting individual units. Nobody wants to count individual paper straws or take-out containers.
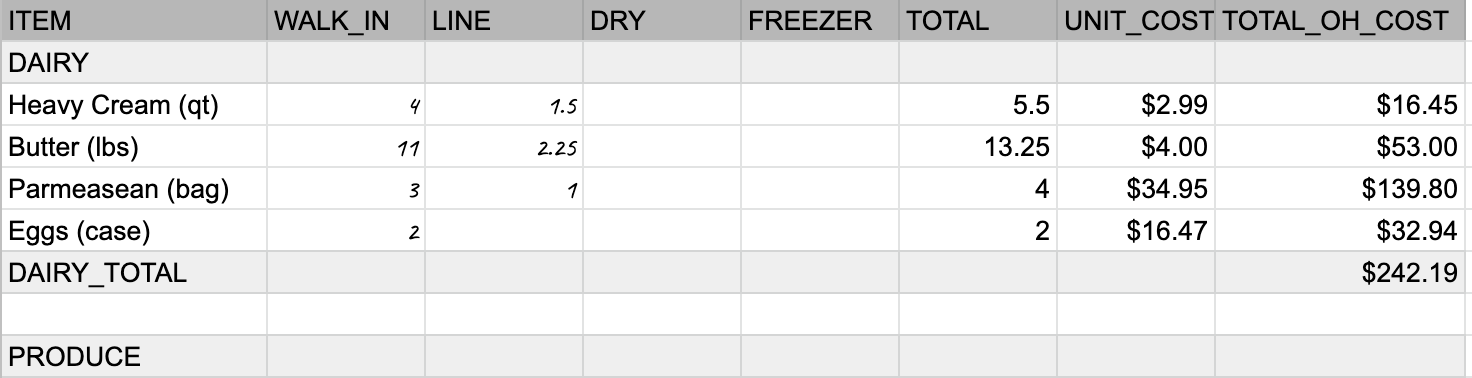
All storage areas are now counted. Tally up each row in the “unit count totals” column, then multiply that number by the “unit cost” in “total on-hand unit cost”. Totaling that column (and it’s advisable to do it for each category) will give you your ending inventory. At the end of the inventory period—whether it be a week, two weeks, or a month—you’ll take all these counts again, repeating the exact same process. This will leave you with a beginning and ending inventory count.
With inventory complete, you can now calculate the key metrics managers and owners use to understand how the restaurant is performing. To calculate usage, you’ll need your starting inventory + orders received – ending inventory. This effectively calculates the total value of all products that have left the restaurant.
Here’s an example:
Last month, your restaurant had an ending inventory value of $5,000. You ordered $12,000 of product this period and ended the month with $5,500 of product on hand.
$5,000 + $12,000 – $5,500 = $11,500
You used, and hopefully sold, $11,500 worth of product this month.
With that usage number, managers can also calculate the cost of goods sold, or food cost. To do so, divide your usage by total food sales for the same period. Multiply that number by 100 to get your percentage. Continuing the example, the fictitious restaurant had $34,500 in food sales for the month:
($11,500 / $34,500) x 100 = 33.33%
As a manager, that percentage tells you how much profit you see from net revenue. This last step is invaluable to managers in providing direction for decision-making. Month over month, monitoring this metric helps managers identify opportunities to improve profitability.
Setting up these systems can be a lot to handle by yourself, but we’re here to help. BevSpot incorporates all these management tools in a comprehensive, cloud-based software package that streamlines these processes. Get started by clicking below to get in touch with a representative.
Schedule 15mins to chat with a product specialist
Start a FREE Trial Today! BevSpot offers full product education and account setup for all customers! No card Information needed!